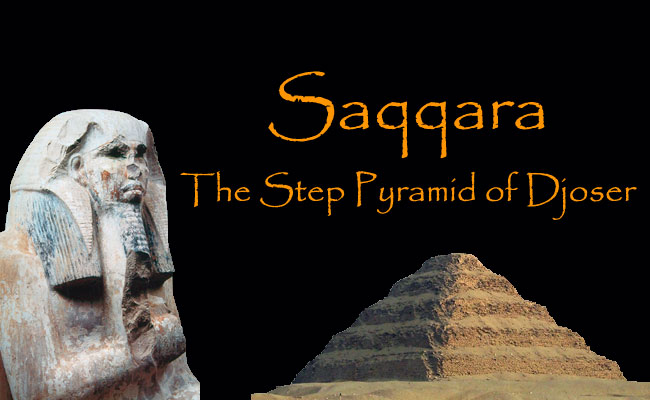
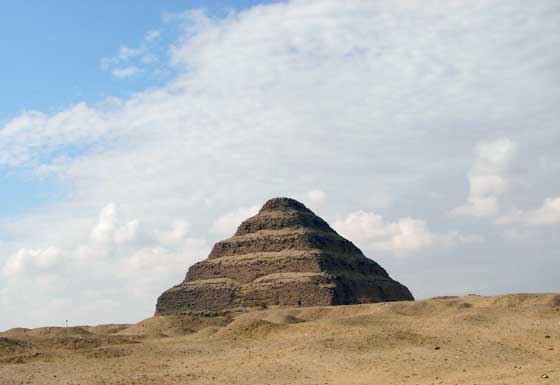
The Step Pyramid
It is quite clear from the excavations, mainly conducted by Jean-Phillipe Lauer between 1926 and his death in 2001 (yes, that is a long time), that there were at least five different phases in the construction of the pyramid and the pyramid enclosure.
The Mastabas
The original plan had been to build a more or less traditional mastaba except that it was to be made out of stone and was square rather than rectangular. It measured approximately 64 metres square and stood about 8 metres high. The core was made out of irregular stone blocks packed with tafla, the local clay, with a sloping outer dressing of Tura limestone. The square shape is unparalleled in the Old Kingdom and suggests to Rainer Stadelmann that a stepped structure was intended from the beginning but on a much smaller scale than the final product. This impression is strengthened by the fact that the mastaba was almost immediately extended by three metres in all directions but not to the same height.
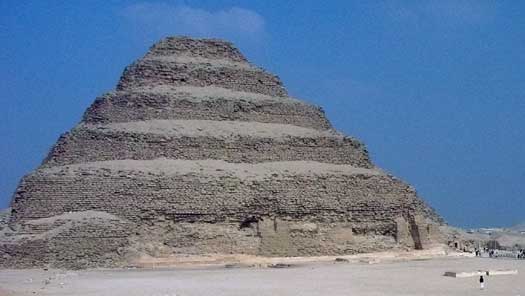
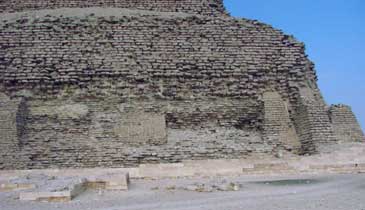
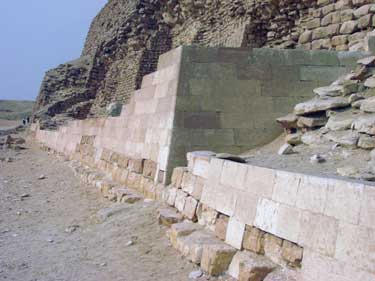
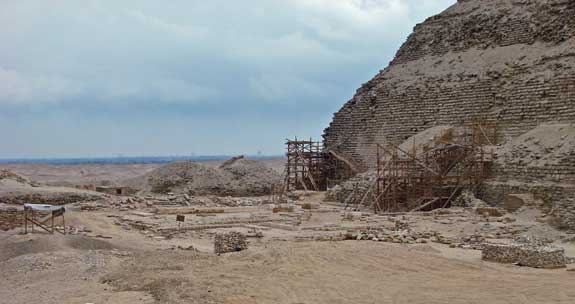
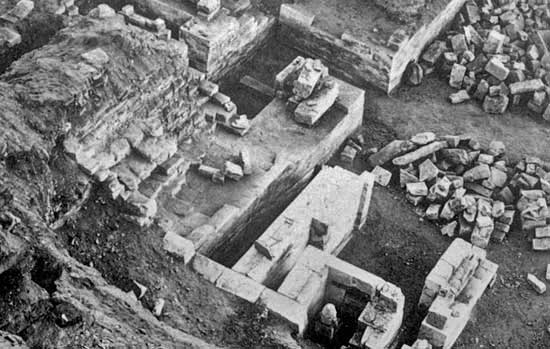
South face of the Step Pyramid with the sequence of construction exposed
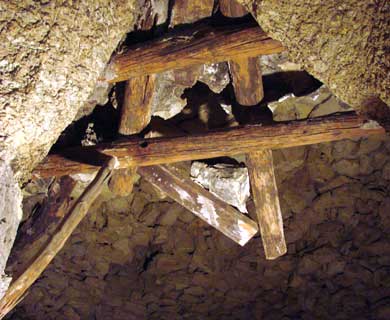
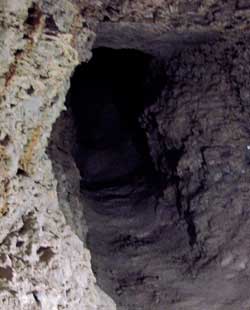
Beneath the superstructure was a vertical shaft measuring 7 x 7 metres and 28 metres deep, at the bottom of which was the Burial Chamber. As they quarried away, the workmen dug a sloping corridor—at first, a trench but, as it went deeper, a tunnel)— to carry the rubble away and to serve as an entrance passage when the tomb was complete. By the time they had finished, the corridor ran from a point about 9 metres above the bottom of the shaft and reached the surface some 50 metres to the north. 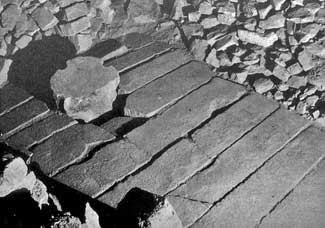
The Burial Chamber (left) was simply a box made out of slabs of pink granite to form a small oblong room about 3 x 1.7 metres and 1.7 metres high. Lauer found evidence of what may have been an earlier vault with alabaster walls and a pavement of diorite or schist. Broken fragments were used as packing material around the final chamber. Included among the debris were a number of pieces decorated with five-pointed stars that most likely formed the ceiling—the earliest example of what was to become a common motif in Egyptian tombs. A small hole was left in the ceiling to admit the body—but there was no room for a sarcophagus. After the funeral, the opening was sealed with a granite plug weighing over 3.5 tons. The space above the compartment was called the ‘manoeuvre chamber’ by Lauer. It would have been where the plug was stored and where the apparatus was set up to lower it into place after the funeral. Three grooves down the outside of the plug kept the ropes from slipping. Unfortunately, the chamber had been virtually destroyed by the activities of tomb robbers but it can be reconstructed based on the one in the South Tomb, which survives. Although the plug was found in place when the tomb was opened in the 1930's, the only human remains found within was a mummified foot which has been dated by radiocarbon to a period several centuries after Djoser's death.
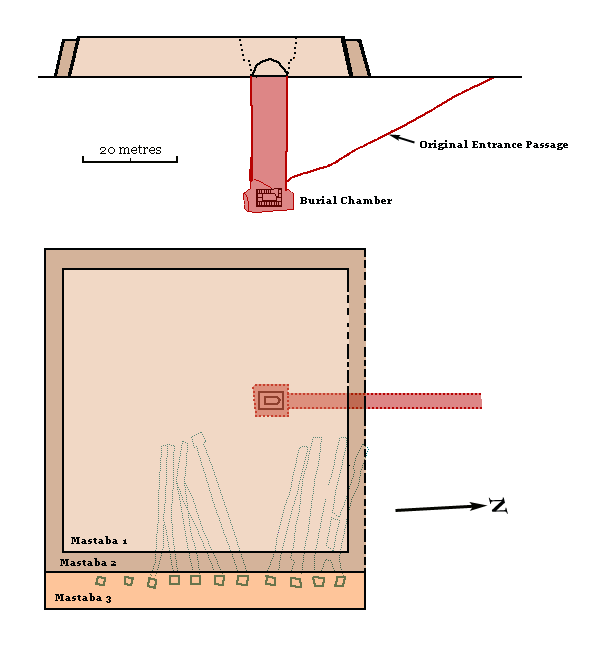
Plan & N-S Section of the Successive Mastabas
Along the eastern side of the tomb was a line of 11 vertical shafts, each of which was sunk to a depth of ca. 32 metres. At the bottom of each was long gallery that ran underneath the mastaba for a similar distance. The level of accuracy in their tunnelling was low, however, and a few actually intersected. It is thought that they were intended for the  burial of members of the royal family. An empty alabaster sarcophagus was found in the fifth gallery (counting from the north) along with a wooden coffin containing the remains of a young boy aged 8-10. Fragments of other sarcophagi were found in the first two galleries and a seal impression bearing the name Netjerikhet (Djoser's Horus name) was discovered in the third. A hip bone belonging to a young woman was found in Gallery 3 but the carbon date from it is much earlier than the conventional dates for Djoser.
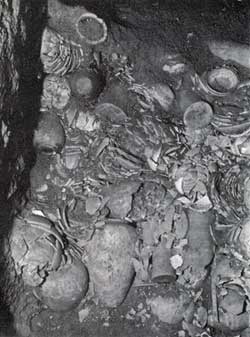
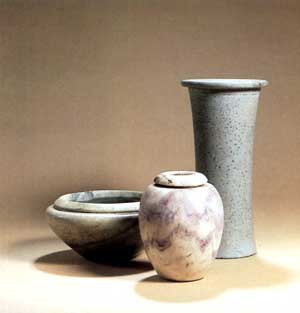
The other galleries, especially the sixth and seventh, were crammed with stone vessels—some 40,000 have been recovered—of various shapes and sizes. Quite a number of them bore the names of earlier rulers from the First and Second Dynasties, including Narmer, Djer Den, Adjib, Semerkhet, Kaa, Hetepsekhemwy, Ninetjer, Sekhemib and Khasekhemwy. It is generally assumed that these had been looted from earlier tombs, but when and by whom is a mystery.One theory is that Djoser collected the surviving material from royal tombs pillaged in the factional strife that characterizes much of the Second Dynasty. The fact that most of the tombs involved were located in Abydos raised further questions.
After the shafts had been filled, the mastaba was extended another 10 metres in that direction to cover the openings. This resulted in rectangular structure measuring 70 x 80 metres. To what extent it can be considered ‘finished’ at this point is open to debate. On the one hand, mastabas were the traditional form of tomb (as far as we know) down to this point. On the other, the practice of burying a stepped mound within a larger superstructure was not unprecedented.
Step Pyramid from the West
The Pyramids
The reasons for the characteristic outline are a matter of some speculation. Was it a stairway to the immortal stars as suggested by the Pyramid Texts? Or perhaps it was meant to represent the primeval Mound of Creation. Or could it simply have been that this was the way they could achieve great height without having the whole thing collapse?
Using the mastaba as the base, Imhotep first designed a four-stage pyramid which rose to a height of about 40 metres. That plan did not last very long, however, and it was further enlarged to six stages, rising 60 metres above a base measuring 125 x 110 metres. A rectangular base is unique 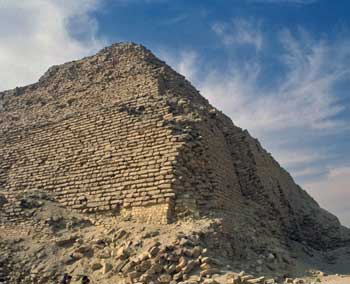 among Egyptian pyramids, which are otherwise all square.
The work involved was enormous. It has been estimated that a total of 850,000 tons of stone would have been needed— more than 4x the material required for the first version. The courses were not laid horizontally but rather in a series of buttresses, inclined inwards at an angle of 75°. This greatly increased the stability of the finished structure by reducing the amount of lateral stress. The core of the structure was made out of small blocks of limestone quarried on the site, encased in fine, white Tura Limestone quarried across the river. The feat is made more astonishing by the fact that building in stone was an entirely new idea in Egypt and huge numbers of stone masons and quarrymen would have to be trained. In fact, the final task would have probably been impossible without the earlier stages of construction to build up a skilled and experienced workforce along with the managers needed to organize everything.
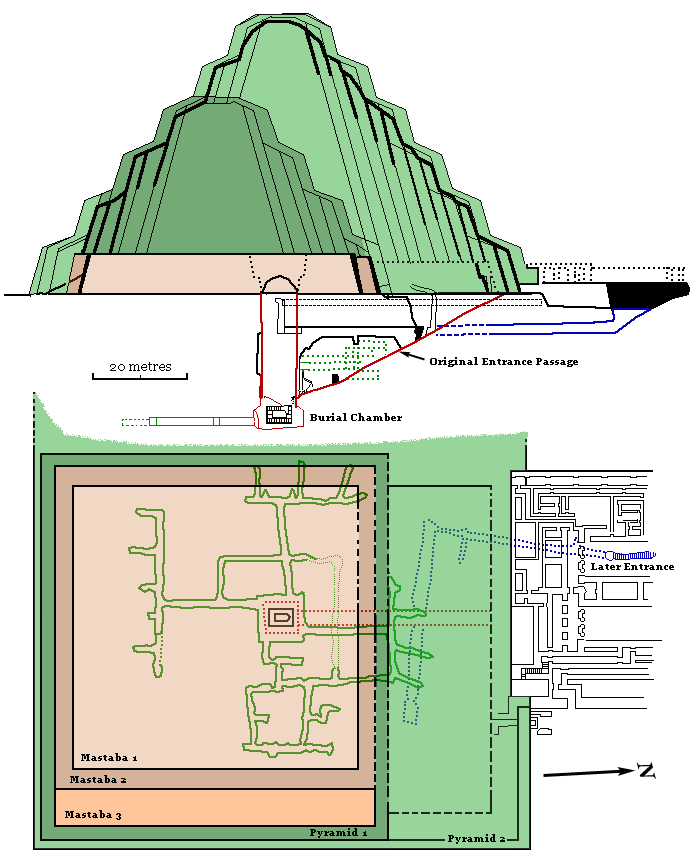
Plan and Section of the Step Pyramid (later robber tunnels and some of the earlier substructure has been omitted from the plan for the sake of clarity)
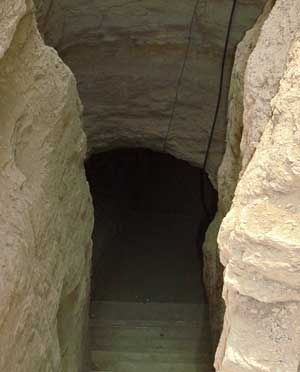
 The immense bulk of the pyramid covered the entrance to the to the original tomb passage and it was apparently considered impractical to simply re cut it so much of it was refilled and a new passageway was dug. The Egyptians were making tremendous advances as stone workers and masons, but their tunnelling skills were lagging well behind. A long flight of steps in an open trench led from a courtyard of the Mortuary Temple to the start of a tunnel roughly 10 metres below ground level. Then it levels and runs off-target for about 35 metres before it strikes off straight for the old sloping corridor, 20 metres away. The way is very narrow for most of its length, particularly just before it turns where it is about 1.2 metres across—not much room to manoeuvre for the funeral party. It precludes the likelihood of a massive stone sarcophagus being involved and, in fact, there is no evidence of there ever having been one. The passageway carries on, past the sloping corridor to create a large storage magazine for food offerings to the deceased.
Galleries
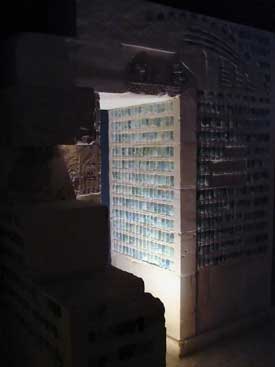
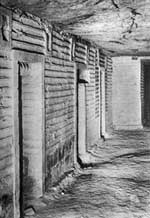 Radiating out from the bottom of the Main Shaft were corridors leading to sets of galleries that surrounded the Burial Chamber. Most of these were used as storage magazines but some of the ones along the east side seem to represent the pharaoh’s private apartments in the royal palace. The western walls of the outermost galleries were decorated with panels of inlaid faience tiles which imitated the reed matting of of the actual building. The backs of the tiles have tenons which were fitted into mortices cut into the carefully draughted channels designed to hold them. There is symbolism involved in the design too—the blues and greens of the faience are colours associated with regeneration and rebirth. Djed-pillars in the panel shown below supporting an arch were symbols of stability.
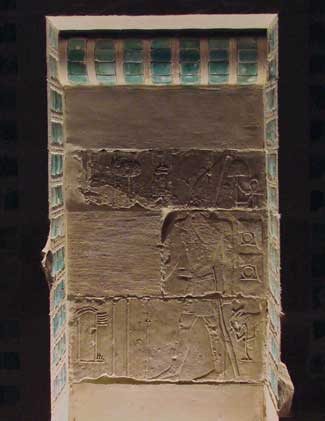
Between the panels were open doorways framing reliefs of the pharaoh performing various religious ceremonies, including the Heb-Sed rituals that were necessary to restore his kingly powers. By depicting them on the walls, of course, meant that they would be performed in perpetuity (or at least as long as the reliefs survived) by the ka of the dead pharaoh.
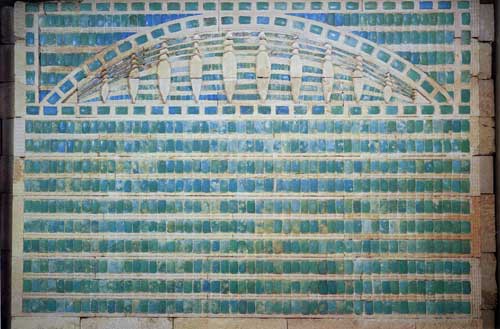
Faience Panel Imitating Reed Matting
Mortuary Temple & Serdab
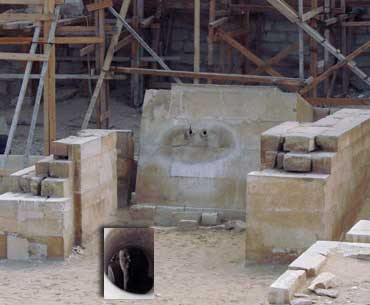
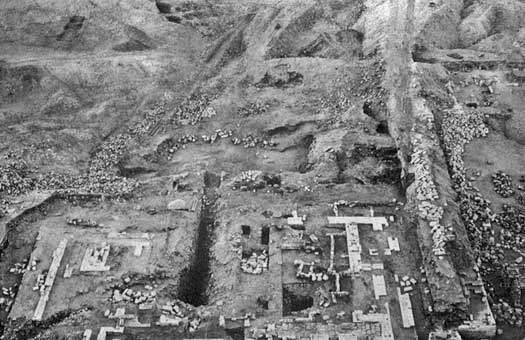
View of the Mortuary Temple from the Northwest
Unlike later examples, which were invariably found on the east side of the pyramid, the Djoser’s Mortuary Temple was built up against the north side. The area was badly disturbed by later activity, mainly tomb-robbing of both the official and unofficial variety. There is little left apart from the bare layout of the rooms, corridors and open courtyards. There are a pair of the latter and presumably shrines representing Upper and Lower Egypt, to provide offerings for the divine pharaoh, but the plans bear little resemblance to well-known examples from later times.
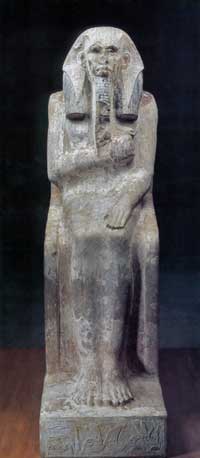
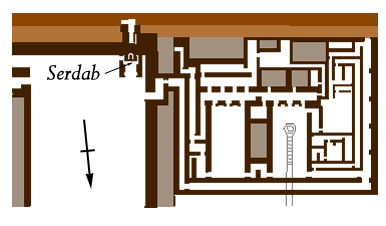
Beside the mortuary temple and built up against the side of the pyramid was a small enclosure, entered by way of stone gates left permanently open. At the rear of this tiny courtyard was a sealed room known as the serdab (the Arabic word for ‘cellar’). Inside was a beautifully painted limestone statue of Djoser sitting on his throne. He is wearing his long heb-sed robe, which envelopes him from the shoulders to his ankles. On his head he wore a heavy black wig covered by the nemes head cloth so characteristic of pharaohs. The purpose of this totally enclosed statue chamber was to allow the ka of the deceased to rise up and view the rituals and sacrifices made in his honour. To further this purpose, two holes were bored through the outer wall of the serdab at eye level.
Overhead View of the Serdab and the Seated Statue of Djoser